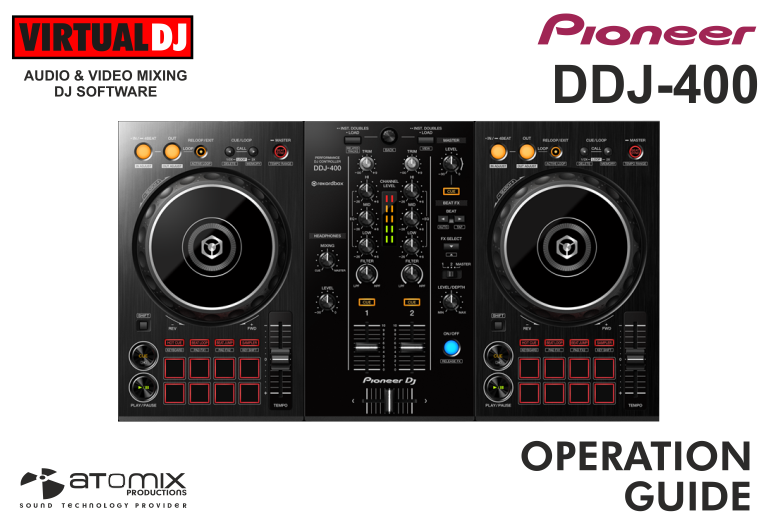
PIONEER DDJ-400
SETUP
Firmware & Drivers
Firmware: No firmware update is available at the time this manual was written, but always make sure your device is on the latest firmware. Check availability at https://www.pioneerdj.com/en/support/software/DDJ-400/
Drivers There is no driver to install for both Windows and Mac OSX. The DDJ-400 is a USB Class Compliant device and your Operating System (Windows/mac OS) will install and use the standard audio driver when the device is connected to your Mac/PC with a USB cable
VirtualDJ Setup
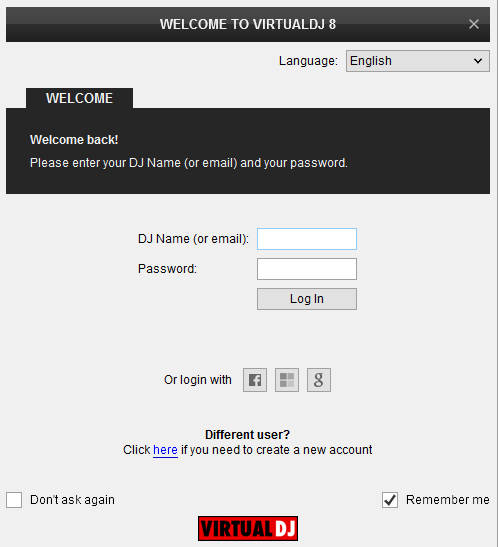
Once VirtualDJ 8 is launched, a Login Window will appear. Login with your virtualdj.com account.
A Pro Infinity, a Subscriber or a PLUS License is required to fully use the Pioneer DDJ-400. Without any of the above Licenses, the controller will operate for 10 minutes each time you restart VirtualDJ.
http://www.virtualdj.com/buy/index.html
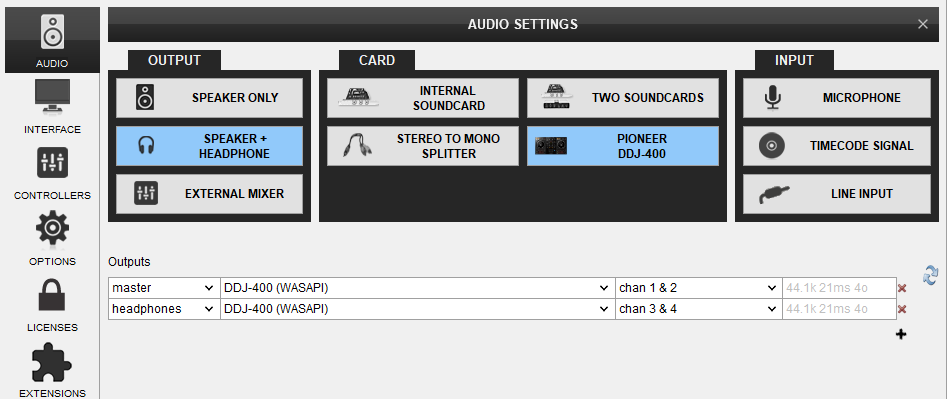
Click on the "Use Soundcard" button if speakers are connected to the Master Output of the DDJ-400. You can still change that from Settings->AUDIO tab.
Click to OK.

MIDI Operation
The unit should be visible in the CONTROLLERS tab of Config and the “factory default” available/selected from the Mappings drop-down list. The factory default Mapping offers the functions described in this Manual, however those can be adjusted to your needs via VDJ Script actions.

Find more details at
http://www.virtualdj.com/wiki/VDJ8script.html
AUDIO Setup
The unit has a pre-defined Audio setup and a special button in the AUDIO tab of Config to provide that.
Please read the manual of DDJ-400 for further functionality https://www.pioneerdj.com/en/support/documents/ddj-400/
For further software settings please refer to the User Guides of VirtualDJ 8.
http://www.virtualdj.com/manuals/virtualdj8/index.html
CONTROLS
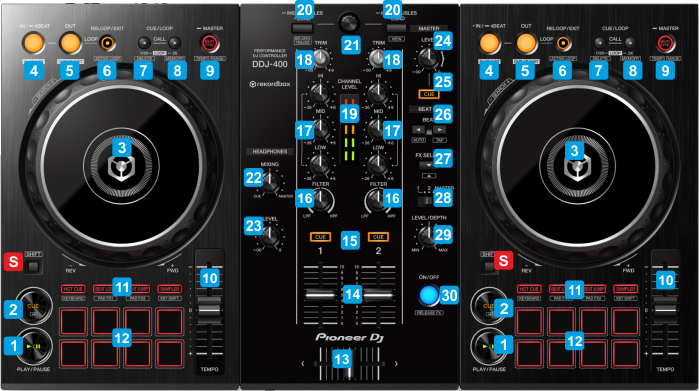
KEY
ACTION
SHIFT (SECONDARY) ACTION
See Pads in VirtualDJ manual
See Pads in VirtualDJ manual
See Pads in VirtualDJ manual
See Pads in VirtualDJ manual
Right LOAD : Cycles Sideview view (Automix, Sidelist, Sampler, Karaoke and Shortcuts)
FRONT & REAR PANELS

CONNECTION
DESCRIPTION
* Note: The Microphone input is not part of the USB Audio Interface of the DDJ-400, therefore it cannot be included to the Audio setup of VirtualDJ, nor can be recorded along with your mix.
OTHER SETTINGS
The DDJ-400 offers a few additional settings to choose/set from a special DDJ400-SETTINGS Pads page, which can be selected from any Deck, only when the DDJ-400 is connected.
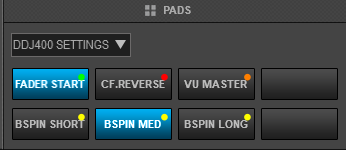
- FADER START Use Pad 1 to enable/disable Fader Start/Stop mode (default is off). When enabled, hold SHIFT and then use Crossfader and/or Volume faders to start/stop the decks when the faders move from the minimum position to a higher one (or vice versa)
- CF REVERSE. Use Pad 2 to enable/disable Reversed Crossfader (default is off). When enabled, the crossfader will blend audio in reverse (Right decks at the left position, left decks at the right position)
- VU MASTER. Use Pad 3 to select what the VU Meters on the DDJ-400 will show. When disabled (default), the VU meters will indicate the output level of the Master Output (in Stereo Left/Right). When enabled, the left series of the Vu meter leds will indicate the pre-fader audio signal level of the Left assigned deck and the right series of the VU meter leds will indicate the pre-fader output level of the Right assigned deck.
- BACKSPIN LEN Use Pads 5,6 and 7 to select the length of the Backspin performed from jogwheel and jog-touch is released.
